Crayon Stage – Babies and Toddlers
Recommended supplies to introduce and why:
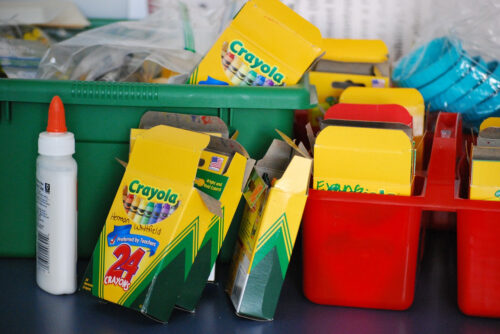
- Crayons – large crayons are ok to try at first if you like, but smaller ones are actually better for fine motor skills and moving into the Pencil Stage. I tried the oversized crayons for a couple of the kids when they were little but actually found they disliked them because they were too big and bulky to do anything with and were more likely to just end up in the mouth – they didn’t seem to be any sturdier in a small hand – Oh, and they were easier to peel the paper from… So, I do recommend smaller ones, but each child is different. Regular crayons are the absolute best first thing for a child to color, draw or scribble with.
- Finger paints are great for this stage – I do NOT recommend the “mess free” finger paints – I think they completely remove all creativity and are worthless, my kids found them boring – and they literally just make a mess with that mess-free stuff anyway. I also don’t think I believe them to be as non-toxic as they say because of the offensive smell they give off. Get regular finger paints – or make your own – How To – Wiki
A little rant…. I’ve seen some things going around Pinterest and other sites for edible paints, play dough – things like “cool whip finger paint” for babies as an example – I think that is rather foolish parenting in many ways – the idea of raising children is to teach them – one of the things to teach them is what NOT to put in their mouth – and some art supplies they may encounter are mildly or highly toxic – so teaching them not to put any art supplies in their mouths removes the possibility of confusion and possible child poisoning in the future. Yes, some children put everything in their mouths – this is why they designed non-toxic art supplies in the first place – that doesn’t mean they are FOR eating – it means that if they consume a small amount it won’t hurt them – and they should be discouraged from doing so. Plus you don’t want a baby or toddler to be confused on what constitutes as “art supplies” – if you’re going to do that you may as well expect them to do the same thing with baby food, cleaning supplies and likely even what they find in their diapers – and you certainly can’t blame them.
Also – Art can get messy all on it’s own – you don’t need them thinking that everything is something to make a mess with. Children should be taught the difference between all things – and for very young children all things that they come in contact with need rules – these things we color and paint with – these things we don’t, these things go in your mouth – these things don’t – simple, smart and safe. Ok, sorry for the mini-rant. 😛
- Playdough is also great to introduce at this stage – non-edible. For the best homemade play dough recipe I’ve found Check Musings from a Stay At Home Mom – this is just a little more than the basic flour, salt, water recipe and it turns out really nice.
- Paint & Large Brushes – for brushes I recommend the oversized paintbrushes – these are great for toddlers because they can get the basic idea of painting with a brush without destroying it because the bristles are stronger and they get the idea of it being a tool. A small, basic watercolor set in the plastic case is appropriate here – ones with only 4 colors are good for younger toddlers.
- Large Colored Pencils – if you can find these I recommend them for the early years as well because they don’t break as easy like the oversized crayons or regular colored pencils – which can be frustrating to a small child who is learning. Because the large pencils also have a specific “point”, unlike the large crayons, they are easier for a small child to guide and learn with – than finer colored pencils.
- Sidewalk Chalk – sidewalk chalk is easy, fun, not messy and if you do have a large sidewalk or driveway area they’re less likely to bother coloring anywhere else.
- Smocks – these are not only great for keeping kids clothes clean but they get the idea of learning about not making huge messes on everything – plus it can be fun for little ones to “dress” for doing art. You can buy them from lots of people, such as on Etsy, make your own, use an apron or go with the old backwards dad-shirt, or any oversized old tee.
- Paper – this can be just about anything at this stage but as long as it’s something the child can understand is for art. For buying paper, there’s no need to get expensive paper – the thin grayish, oversized doodle pads are great for this and you can get into better paper after the child has gained an understanding of what the supplies are for and how to use them. I actually prefer to hold off on coloring books at this stage – except maybe for in the car, so very young children don’t get the idea of coloring in books – this can be slightly confusing until they understand the concept. Printing single & simple coloring pages are actually better for them at this stage. Repeating the lesson that only the paper is for the art supplies is also important for them to hear each time they use supplies until they understand it fully. Cheap construction paper is also good to have for younger kids – dark paper for light crayons, and learning to use scissors is more fun on colored paper.
- Safety Scissors – you may think scissors are not for young children, but they actually learn to do quite well with them under the right guidance and it’s a good thing for them to learn early. My children were learning to use scissors anywhere from 1-2 years old without any problem. The reasons problems do arise with them is when they can get to them themselves anytime they want (such as older siblings leaving them out) – so you want to be sure you keep them put away – maybe under lock and key… unless you are completely with them while they use them – and be sure they don’t know where and cannot get to them when you put them away.
- Tables & Easels – Easels are nice for gross-motor things like finger painting – if you can take them outside it’s really nice, but sitting at a table is just fine. When my older kids were little we had a cool little vintage table that had a seat that folded up from the center that you could set the child in – that was very neat. For the twins we just used the high chairs – and it’s also nice if you have a table that the high chair just fits under. They should have something sturdy under their paper, not carpet, so they don’t accidentally put holes in it because then the fascination with punching holes in the paper becomes the lesson and you lose the “art” aspect and suddenly have a child who is more interested in destruction rather than creating. Don’t use books as a hard surface either – even if it’s a book you don’t like or care about – they’ll get the wrong idea about books very quickly. Always use something like a table for the first few years.
Now What?
So now you have your Baby & Toddler Art supply list – the best thing now is to just set aside a little bit of time when your little one is not sleepy and well-fed – small chunks at first and work up to larger time chunks and let them have at it. At first just show them how to scribble and what the object you gave them is for – making color on paper. Be sure to encourage them when they do it and gently correct them if they color on anything other than the paper. Teach them what the colors are, but don’t concern yourself with them coloring things the “right” colors. Let them “play” with scribbling for a while and leave them be for a few minutes – keeping an eye that they don’t get bored with it. As soon as they get bored with it – it’s time to quit.
Just doing this for 10-30 minutes each day – or just a couple days a week, with an older baby who can grasp a crayon is enough – it helps them to learn to do things on their own for a bit and it gives them a handle on fine motor skills. As they get older and their skill develops more you should begin adding the other mediums listed above – one at a time for a couple weeks at a time before moving onto something else. And then by the time you realize it you’ll have a little artist on your hands that will be able to use a variety of mediums on their own and will be all ready for printing with a pencil and more formal art lessons.
How to keep your art supplies with toddlers – those little toy bins and cute organizer shelving things are cute, but honestly not practical for little ones except for toys. It’s much better to keep art supplies specifically for them in a box that you can close and put away when not in use – in a heavy drawer, cupboard, closet or somewhere they cannot “see” it – especially if they climb. This is much harder when you have older kids who have their own art supplies and don’t always have them put away – quite disastrous sometimes! But, this also serves as an excellent, sometimes heart-breaking, lesson as to WHY we put things away when we’re finished with them for the older kids. You also may notice markers are not listed above – more on that in the next post.
Read more about the Pencil Stage in next week’s post!